Sketch-n-Sketch [Tutorial]
Step 2: Constant vs. Computed Attributes
In this lesson, we will cover:
- How to program and directly manipulate "computed" attributes,
- How to control what parameters may and may not be directly manipulated, and
- How to employ the Group Box pattern.
Two Kinds of Parameters
When programming designs in Little, there are two primary ways to define
attributes of a shape: the first is by specifying a constant expression (for
example, using a number 3.14 or a variable pie that stores a number), and the
second is by specifying an expression that computes a value (such as (/ pie 2)).
In the first lesson, all of the attributes of our rectangles were constant
expressions. As such, manipulating any one of their attributes in the canvas
led to a single, straightforward change to the input program, namely, a change
to the appropriate constant expression in the program. When manipulating a
computed expression, however, there are multiple constants in the program that
"contribute" to the final value, so it's not immediately clear what the user
intends and, thus, what Sketch-n-Sketch should do.
The best way to explain some of the challenges is to work through an example. Let's pick up with the three rectangles example from the first lesson. Start by reloading the final program (or, to test your Little skills, rewrite it from scratch).
Now, recall that we defined the x-position of each box so that they were evenly spaced. We defined these positions using hard-coded constant expressions. This isn't so great, however, because if we want to change the separation factor, we would have to manually recompute and change the x-positions of multiple shapes — remember that really annoying part of Exercise 1.1? Instead, let's rewrite our program to compute the x-positions based on the desired start position and spacing.
Practice 2.1: To make this change, define two variables at the start of your
program x0 and xSep. As a reminder, you can define variables using the def
syntax as below. Remember that you need to define any variables before you use
them in your program, so make sure that this definition comes before any other
statements in your program.
(def [x0 xSep] [100 150])Next, redefine your placeRectangle function to take the "index" instead of the
box (that is, the 0th box, 1st box, 2nd box, and so on) rather than its
x-position. Using this indexing scheme, the x-position of a the index-th box
will be determined by the expression (+ x0 (* xSep index)).
Finally, redefine the SVG canvas to map the placeRectangle function over a
list of indices instead of x-positions. Start with index 0 so that the first
rectangle is placed exactly at position x0. After doing this, run the program
and examine your output. Feel free to manipulate the shapes a bit to get them
all in view, and to change the list of indices to add or remove boxes from the
design.
Directly Manipulating Computed Values
Let's now take a closer look at how Sketch-n-Sketch decides how to update the
program when one of the boxes is directly manipulated. Notice that all of the
x-positions are determined by the same expression (+ x0 (* xSep index)), and
that different values of index lead to different resulting values. For the
0th box, the x-position is completely determined by x0 because (* xSep 0)
is equal to 0. Therefore, when you directly manipulate the position of this
box, Sketch-n-Sketch has no choice but to change the value stored in the x0
variable.
For each of the remaining boxes, however, there are three constants in the
program that contribute its x-position: x0, xSep, and index. For example,
when dragging the second box from an initial x-position, say 250, to a
new position, say 400, there are many different changes to x0, xSep, and
index (infinitely many, the realities of floating-point arithmetic notwithstanding)
such that the result of the expression (+ x0 (* xSep index)) is 400.
So, what is Sketch-n-Sketch to do in the face of such ambiguity? One option is to "pause" and explicitly ask you, the user, what kinds of changes to the program you want in response to dragging each box. This would really hinder the interactivity and utility of our tool.
Instead, our design automatically chooses which constants in the program to change using some simple heuristics (described in this technical report if you're curious) without asking for the user's help. To explain these choices, when the user hovers over a zone for a particular shape, Sketch-n-Sketch highlights the parts of the program that will change in response to direct manipulation (recall the green, yellow, red, gray discussion from the first article).
Practice 2.2: Try directly manipulating various zones of the different rectangles and see what happens. Sometimes the program update that Sketch-n-Sketch infers to match your changes to the canvas may not be exactly what you want. Oops, sorry about that! Our hope, however, is that the default choices are often useful, and that the benefits of the immediate interactivity outweighs the drawbacks of sometimes getting program updates that you didn't want. In the latter case, remember that you can also Undo your most recent actions. In the next section, we'll also describe a way to exert some control over the choices that Sketch-n-Sketch makes.
Exercise 2.1: Now is a good time to pause and experiment a bit on your own. Try modifying
the Little program to compute other attributes of the boxes. One possibility is
to add a ySep parameter to vary the y-position of the shapes depending on the
index. Another possibility is to define some sort of scale factor and use it
to vary the width and height of the boxes.
Freezing and Thawing Constants
By default, Sketch-n-Sketch may change the values of all numeric constants in
your Little program to help reconcile the changes you make via direct
manipulation. You may find that there are numbers in your program that you do
not want to be changed no matter what happens in the canvas pane. You can
instruct Sketch-n-Sketch not to change a number by "freezing" it, indicated with
a bang (!). We say that a number is "thawed" if it is not frozen. Only thawed
numbers may be modified via direct manipulation.
For example, try modifying the variable definitions as follows:
(def [x0 xSep] [100 150!])As a result, Sketch-n-Sketch may modify the value of x0 but not xSep. Try
directly manipulating the boxes to see what happens. Also try freezing x0 and
unfreezing xSep.
You may have noticed that manipulating certain rectangles actually changes the
index values. Although when writing the program, you may have a clear sense
that indices ought not to change, in general, these are perfectly plausible
values to change to reconcile updates to the canvas, so sometimes
Sketch-n-Sketch will choose to modify them. In cases like this, you can freeze
the particular constants to declare your intent.
If you structure part of your design around the
(map drawingFunction indices)pattern, it is often a good idea to freeze all of these indices. Try freezing all of the indices above and, again, see what happens when you directly manipulate different boxes.
By default, all numbers not explicitly annotated as frozen are treated as thawed. Sometimes, however, you may want the default to be reversed; that is, you may want Sketch-n-Sketch to treat all numbers as frozen unless explicitly thawed. This is particularly desirable when you have lots of constants in your program, or when your design is "mature" and you only want to be make small changes via direct manipulation. There's an option you can declare at the beginning of your program if you would like this behavior instead. If you would like to see how this works, take a look at the built-in example called Thaw/Freeze in the dropdown menu. (Don't forget to hit Save before you switch examples!)
![]()
Exercise 2.2: Take a look at the built-in Logo example, which is our logo for
Sketch-n-Sketch born and raised using our tool. Try directly manipulating
various attributes of the design, freezing and thawing constants as desired.
Once you are comfortable, modify the program so that it draws the logo twice
side-by-side separated by a distance of delta pixels. Structure your changes
so that you can still directly manipulate the delta parameter with ease. Also,
try to set things up so that you can directly manipulate the height and width of
the entire "double logo" design. (Hint: if you get stuck on this last bit, keep
reading below.)
Group Box Pattern
Perhaps suprisingly, one of the parameters that ends up being computed in many designs is the overall width and height of the graphic. In cases where the ability to change the overall width and height is desirable, a useful design pattern to employ is a "group box." The idea behind a group box is to define at least two parameters that represent the width and height of the design and then have an "invisible" box behind the visible portion of the graphic that allows you to manipulate them. Then, you define the rest of your graphic in terms of this width and height, making it such that changes to the overall width and height will scale the rest of your graphic appropriately. In addition to these width and height parameters, it can be useful to define an x-offset and y-offset parameter as well, which allows for the translation of the entire design.
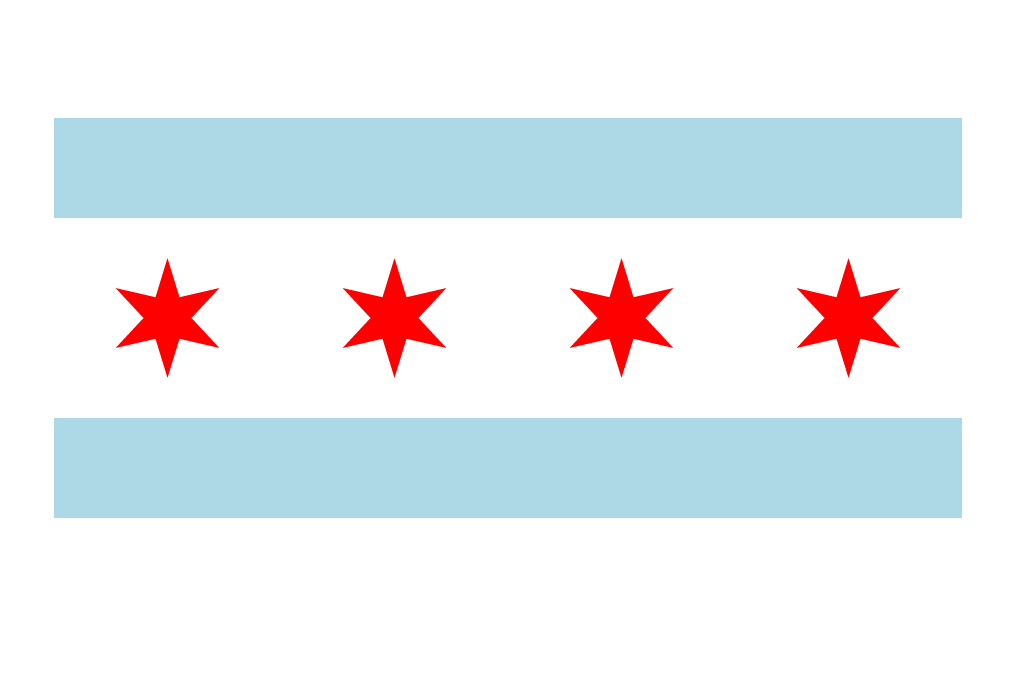
One such example that benefits from this is a flag, as it is a design that often needs to be translated and scaled when used in other graphics. Since we're based out of Chicago, we'll step through how to define and manipulate the Flag of Chicago using Sketch-n-Sketch. Along the way, we'll practice using our skills freezing constants, in addition to the basics we learned last lesson.
Although it is often helpful to define a group box first, you may sometimes realize that you want one only after you've developed parts of your design. No matter, you can always go back and refactor your design so that the attributes of your shapes derive from the overall height, width, and position attributes of the group box.
Practice 2.3: Let's define initial width, height, x-, and y-position values that will be used to position and proportion our box. Then, define a group box that has position and dimension exactly equal to those values. An important aspect of a group box is that it should not affect the final image, so defining its color with an RGBA value with an alpha-component of zero is a good idea. Putting these together, we have the following:
(def [x0 y0 w h] [66 66 450 300])
(def groupBox
  (let [deltaP deltaS] [10! 20!]
  (rect [255 255 255 0]
        (- x0 deltaP) (- y0 deltaP)
        (+ w deltaS) (+ h deltaS))))
Here, deltaP and deltaS represent the difference between the positioning
(both x0 and y0) and the sizing (both w and h) of the group box and its
contents. Think of this as a layer of padding that allows for easier
manipulation of the dimensions and positioning without accidentally grabbing an
interior shape. This issue is more prevalent in more crowded designs, as can be seen
in the built-in examples US-13 Flag and US-50 Flag. Notice that, as a matter of
style, we've chosen to use a let inside the groupBox definition — rather
than a def outside of it — for these variables since we will not need
them anywhere else later in the program.
Once you've defined this, put your groupBox into an svg definition at the
end of your program, turn on [Zones] Basic, and resize it to
your liking. Now, all the graphics you define should go inside the boundaries of
this box and have their proportions tied to the size and position of the group
box.
It's important to remember that the shapes shouldn't completely overlap the
zones for the manipulation of the group box, otherwise you will not be able to
adjust those parameters. For instance, the blue stripes (the CSS color
'lightblue' is a close enough match for our purposes) should be positioned
such that you can still manipulate the underlying group box. So, the following
definition is one way to define the stripes (keeping in mind, of course, the
official proportions):
(def stripes
  [ (rect 'lightblue' x0 (+ y0 (/ h 7!)) w (/ h 6!))
    (rect 'lightblue' x0 (+ y0 (* 5! (/ h 7!))) w (/ h 6!)) ])
Note that we've frozen all of the constants that we use to do the proportioning of the shapes, since we don't want to accidentally directly manipulate them later.
Exercise 2.3 (Optional): Refactor the stripes definition with additional
variables (using let-expressions) to eliminate redundant calculations.
Practice 2.4: Next, we need to define the six-pointed stars that run horizontally across the
middle of the design. Programming a six-pointed star is an interesting
exercise in its own right, but it's a common enough shape that we've made a
built-in function to generate n-pointed stars, nStar (If you're interested in
how it's implemented, check out the Stars example or the
Prelude. The nStar function takes
arguments of the following form:
(nStar fill stroke w n len1 len2 rot cx cy)nStar define the following:
fillis the color of the fill of the starstrokeis the color of the outline of the star ('none'is an acceptable and commonly used value)wis the width of the outlinenis the number of points on the starlen1is the length from the center of the star to the outer pointslen2is the length from the center of the star to the inner pointsrotis the amount of clockwise rotation in radianscxis the x-position of the center of the starcyis the y-position of the center of the star
To define a six-pointed star with the appropriate color and dimensions, we could write the following:
(def placeStar (\i
  (let xi (+ x0 (* i (/ w 4!)))
  (nStar 'red' 'none' 0! 6! (/ h 10!) (/ h 25!) 0! xi (+ y0 (/ h 2!))))))
Then, we can define all of our stars as follows:
(def stars (map placeStar [0.5! 1.5! 2.5! 3.5!]))Add these stars to the overall svg canvas — via `(append [groupBox]
(append stars stripes))` or, equivalently, (concat [groupBox] stars stripes)
— and out comes our flag! All that work to incorporate the overall width and
height of the image now pays off, as we can translate and scale the whole design
and not have to worry about fixing the proportionality by hand.

Exercise 2.4: Now that you have some experience with computed attributes and the group box pattern, it's your turn to run wild! Pick the flag of a country or city (ideally, not one that is already in the examples) and recreate it. Be sure to use a group box to be able to adjust the overall size and position. You'll probably want to choose a flag that consists mostly of simple shapes for now, because we haven't talked about polygons or curved lines yet. But if you cannot bear the anticipation, you can look at Prelude to see how lines and polygons are drawn. If you do, then one enjoyable option may be to tackle the flag of Sealand while listening to this podcast.